A Quick Look at Ghidra BSim
On December 22 2023, the Ghidra project released version 11 of the Ghidra Software Reverse Engineering platform. After reading through the Release Notes, a “major new feature“ caught my eye: BSim, which promises to offer a scalable system for static software comparative analysis within Ghidra. This intersects nicely with my own graduate research at University of Cincinnati, so I decided to give it a whirl over the break.
What is BSim?
An Extension for Ghidra
If you aren’t yet familiar with Ghidra, it is a Software Reverse Engineering tool, released by the United States National Security Agency (NSA), that assists with static and dynamic analysis of compiled software, often focusing on cases where you (the analyst) may not have access to the original source code or documentation. In addition to the link above, my malware analysis course has multiple lectures and notes covering Ghidra.
BSim is a new feature for Ghidra that is implemented as an extension module paired with a new dedicated server component (that is independent of the “Ghidra Server” functionality, if you are already familiar with that).
Capabilities of BSim
BSim analyzes each of the identified functions within your binaries and produces a “feature vector” for each of them that is largely based upon Ghidra’s P-Code representation of the function, plus a few other observations. P-Code is the generic pseudo-assembly language that Ghidra uses internally to translate from every machine language it supports. This is the “secret sauce” under the hood that makes Ghidra unique and powerful. As BSim is largely built from utilizing this dataset, it presents not only the possibility to search for identical or similar (slightly modified) functions across your library, but also offers the potential to be able to perform these comparisons and discover matches in binaries that were compiled for different architectures. For instance, if a malicious malware author used the same C++ code for an encrypted communication channel in malware targeting Windows on AMD64 and then also wrote different malware for an ARM64 macOS system that reused that same code, in theory BSim should be able to help identify this potential relationship.
BSim accomplishes this by generating signatures for each function within a Ghidra project’s binaries, and then stores these in a database. In the case of
an Elasticsearch back-end, the database needs a plugin installed that can perform the similarity comparisons across the feature vectors generated by
BSim. In order to generate more signatures for additional binaries and commit them into the database, a bsim command-line utility has been provided. The
Ghidra UI, however, can be used to perform context-aware queries against this database, using the currently open analysis project(s), and a configured
database connection to a running BSim server.
The Ghdira Project has a short tutorial that is worth following for exploring BSim’s various features. The Ghidra tutorial has you create a small local “H2” database, which is sufficient for smaller-scale libraries and comparisons, but won’t scale as well as the other two options (nor will it be as suitable for sharing/collaboration).
Set Up BSim Elasticsearch Database
I attempted to get this project working via the PostgreSQL instructions and bsim_ctl that are present within the Ghidra Help system’s BSim section.
Unfortunately, following the instructions there resulted in a PostegreSQL build that would crash immediately after starting, so I pivoted to use the
Elasticsearch back-end instead, and so far that one has been working fairly well. An important caveat, however, is that the
BSim capability still requires a special plugin to be installed in Elasticsearch, named lhs.zip, and distributed within the ZIP archive that Ghidra
is distributed in (actually, it’s inside a ZIP file which is inside that ZIP).
In order to ease all of this for a demonstration, I have created the following repository in GitHub with some scripts and Docker recipes to help bootstrap a functioning Elasticsearch-based BSim database:
There are more detailed instructions in its README, but a simple start is to clone
the repository, modify the default .env (if needed) and run the setup script:
git clone https://github.com/ckane/ghidra-bsim-elastic.git
cd ghidra-bsim-elastic
cp .env.sample .env
For basic usage, you can simply use the default .env. However, open it in your editor and determine if you want to change anything, such as the
listen port for BSim’s Elasticsearch back-end if it would conflict with another Elasticsearch instance you’re already running. Once satisfied, run
the setup script. Follow the instructions when prompted as you will be prompted to provide the generated superuser password in order to create the
BSim database, and you may be prompted to confirm potentially destructive overwrite actions, if this isn’t your first time running the script.
./setup_bsim_elastic.sh
Once the setup script completes (should be a few minutes) and has no errors, there should be a new container running Elasticsearch listening on the
port specified as ELASTIC_PORT in .env. By default, this is port 9200, which is the standard Elasticsearch port. This instance will have a new
database & index named bsim created and ready to add malware signatures to it.
Create Ghidra User
Ghidra’s UI will use authentication to access the BSim database, and this authentication layer is actually managed by Elasticsearch, not BSim or
Ghidra. You will want to create a new Elasticsearch user with privileges to modify the bsim database, and give it a password. A script named
add_user.sh has been provided to create these users. To create a new user with a specific password:
./add_user.sh username secretpw
The above will create a new user named username with a password secretpw in the Elasticsearch instance that contains the BSim database. This
user will be granted the superuser Elasticsearch role,
so that the user may read from the database as well as contribute new samples to it. More restrictive and complex administrative roles can be
created within Elasticsearch, if desired, but that is beyond the scope of this post.
Once created, the above user credentials can be used within the BSim feature in Ghidra, to connect to a new BSim database. For the command line
stuff within my GitHub repository, the elastic user will continue to be used. However, Ghidra
by default will assume the username of your logged-in user is the username to use for all authentication, so make sure to create a username
matching that which your Ghidra UI uses.
Importing Samples
Similar to above, I have created a script to ease the workload of ingesting large folders of multiple malware samples. Similar to the setup
script earlier, it will display the elastic user’s password to you and ask you to manually enter it in order to proceed. VirusShare offers
some great freely-available sample sets that are categorized (APT1, Loki, Mediyes, Zeus, Locker, etc…), which make great candidates for
this kind of analysis. The VirusShare Torrent Tracker provides torrent links to download these all. A
great example set is the APT1 corpus
which has some corresponding malware analysis
reporting from Mandiant. If the direct corpus
link above fails to work, visit the earlier “tracker“ link, and look for it in the generated list.
For this exercise, we will assume that the VirusShare_APT1_293.zip has successfully been downloaded.
mkdir -p vxshare_apt1
cd vxshare_apt1
unzip ../VirusShare_APT1_293.zip
cd ..
./add_samples.sh apt1 ./vxshare_apt1
The above will import each of the samples, one at a time, into a new project named apt1 within the bsim_projects workspace directory.
Clearly, with 293 samples, this will take some time. After all have been imported into the apt1 Ghidra project, the bsim command to
generate and commit signatures into the database will be performed, and the script will ask for the elastic user’s password to be
manually entered again (similar to the setup script). Each sample’s feature vector will be computed and stored in the bsim database,
which will be another long-running ingest process. Once it is complete, the data set is available to use from within Ghidra.
In addition to the above, the scripts
ImportAllProgramsFromADirectoryScript.java
and
GenerateSignatures.java
can be used from the GUI to accomplish these same tasks, though with a bit more manual effort. The
BSim tutorial can introduce you to using
these. The File->Batch Import operation within the UI can also help importing large sets of binaries.
Enable BSim Within Ghidra
After completing the earlier steps, there should be a ./bsim_projects/vxshare_apt1.gpr file created. The setup script run earlier
downloads and installs a Ghidra installation into ./ghidra_11.0_PUBLIC that can be used. As well, any personal installation of
Ghidra stored elsewhere can also be used, so long as it is version 11.0 or later. The copy installed in the repository directory
will continue to be used for all command-line helper scripts, however.
After opening up Ghidra, use File->Open Project to bring up the dialog to navigate to the vxshare_apt1.gpr project file mentioned
in the previous paragraph. Once opened, it should show up in the Active project listing, similar to below (note that due to choice of
project name, and also some prior work, the list might not look exactly like this):
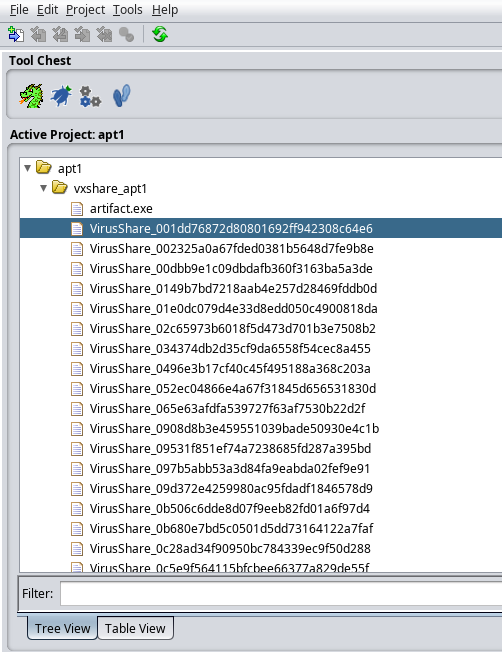
Double-clicking on one of the VirusShare_* items in the list will bring it up in the Ghidra CodeBrowser. Within the CodeBrowser,
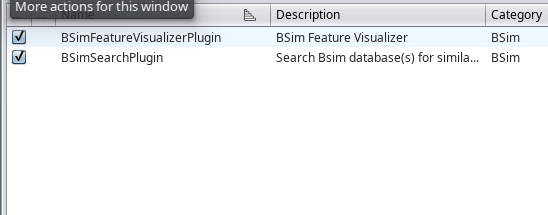
select File->Configure and it will bring up a dialog. Check the checkbox for BSim, and then click its Configure link to bring
up the BSim Plugins dialog. Check all the checkboxes available there, in order to enable the most BSim features. Once done, click OK
to close the plugin selector, then Close on the Configure Tool.

Once this is all done, a new BSim menu should be present in the menu bar of the CodeBrowser.
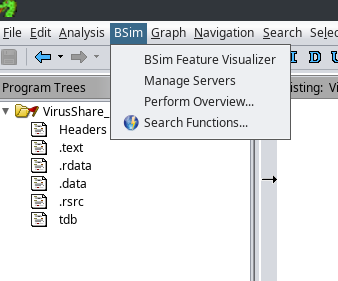
Choosing BSim->Perform Overview will give a high-level summary of the functions within the binary that have at least one potential
match elsewhere. The BSim system will prompt for the BSim Server. If the connection to the Elasticsearch BSim server hasn’t been
established yet, clicking the “cog” icon button next to the BSim server drop-down will bring up another dialog allowing it to be
added, giving the hostname (localhost, for the demo), port, type of database (Elastic), and the username and password created earlier.
Once added, the database will be available in all BSim drop-down lists. Setting the similarity threshold to something lower than the
default of 0.7 can help provide some more comparison results, at the expense of mis-matched identifications.
Overview Analysis
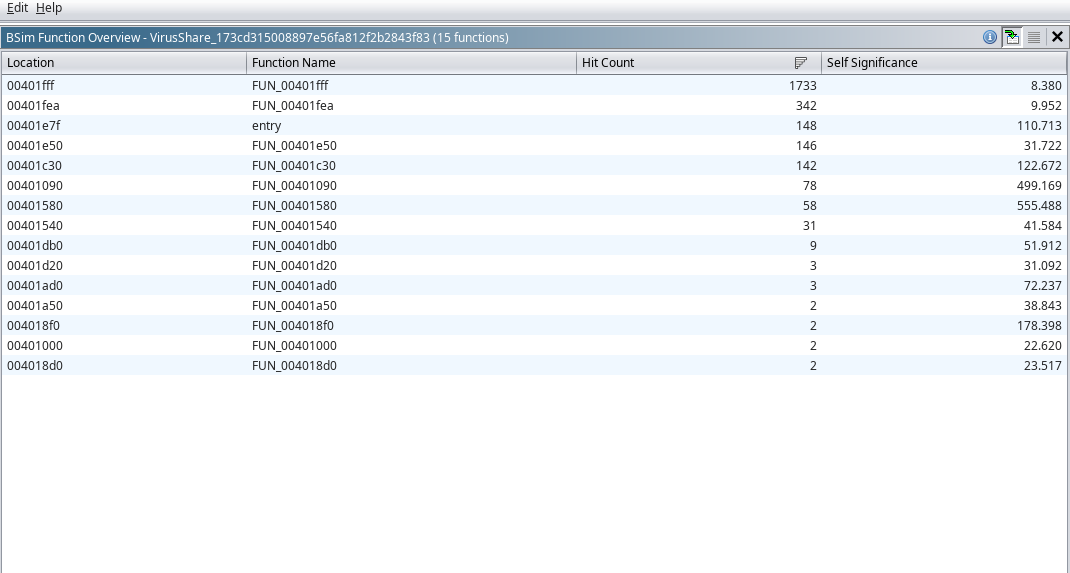
After choosing BSim->Perform Overview, and providing the necessary inputs, a table will be displayed that summarizes each of the
functions within the binary that appear to have a match within the bsim dataset. It displays where in the program’s virtual memory
the offset of the function is, the name/label of the function in Ghidra, the number of hits within the data set
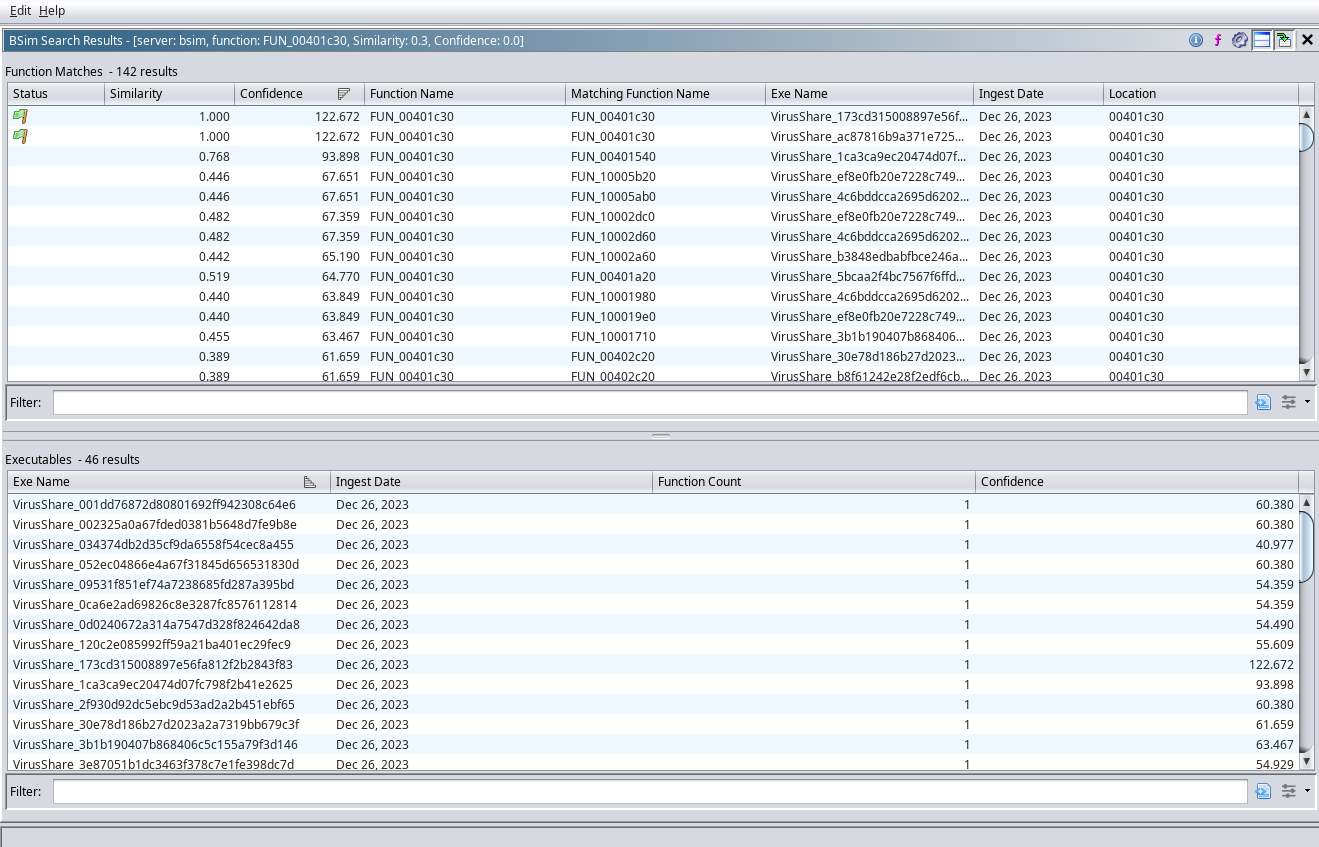
Function Match Analysis
Right-click on any of the rows, and a menu pops up that allows the user to Search Selected Functions. Choosing this option brings up another dialog that is a function-context list of all the matches (in other words, it’s a zoom in on the highlighted row). This view is split in half, with the top pane listing the different functions that are similar, and a lower pane that lists the binaries that have similar functions, but summarizes multiple hits from the same binary into a single row. The similarity score describes how similar the feature vector is, while the confidence score is used to rank which similarities are considered higher-confidence.
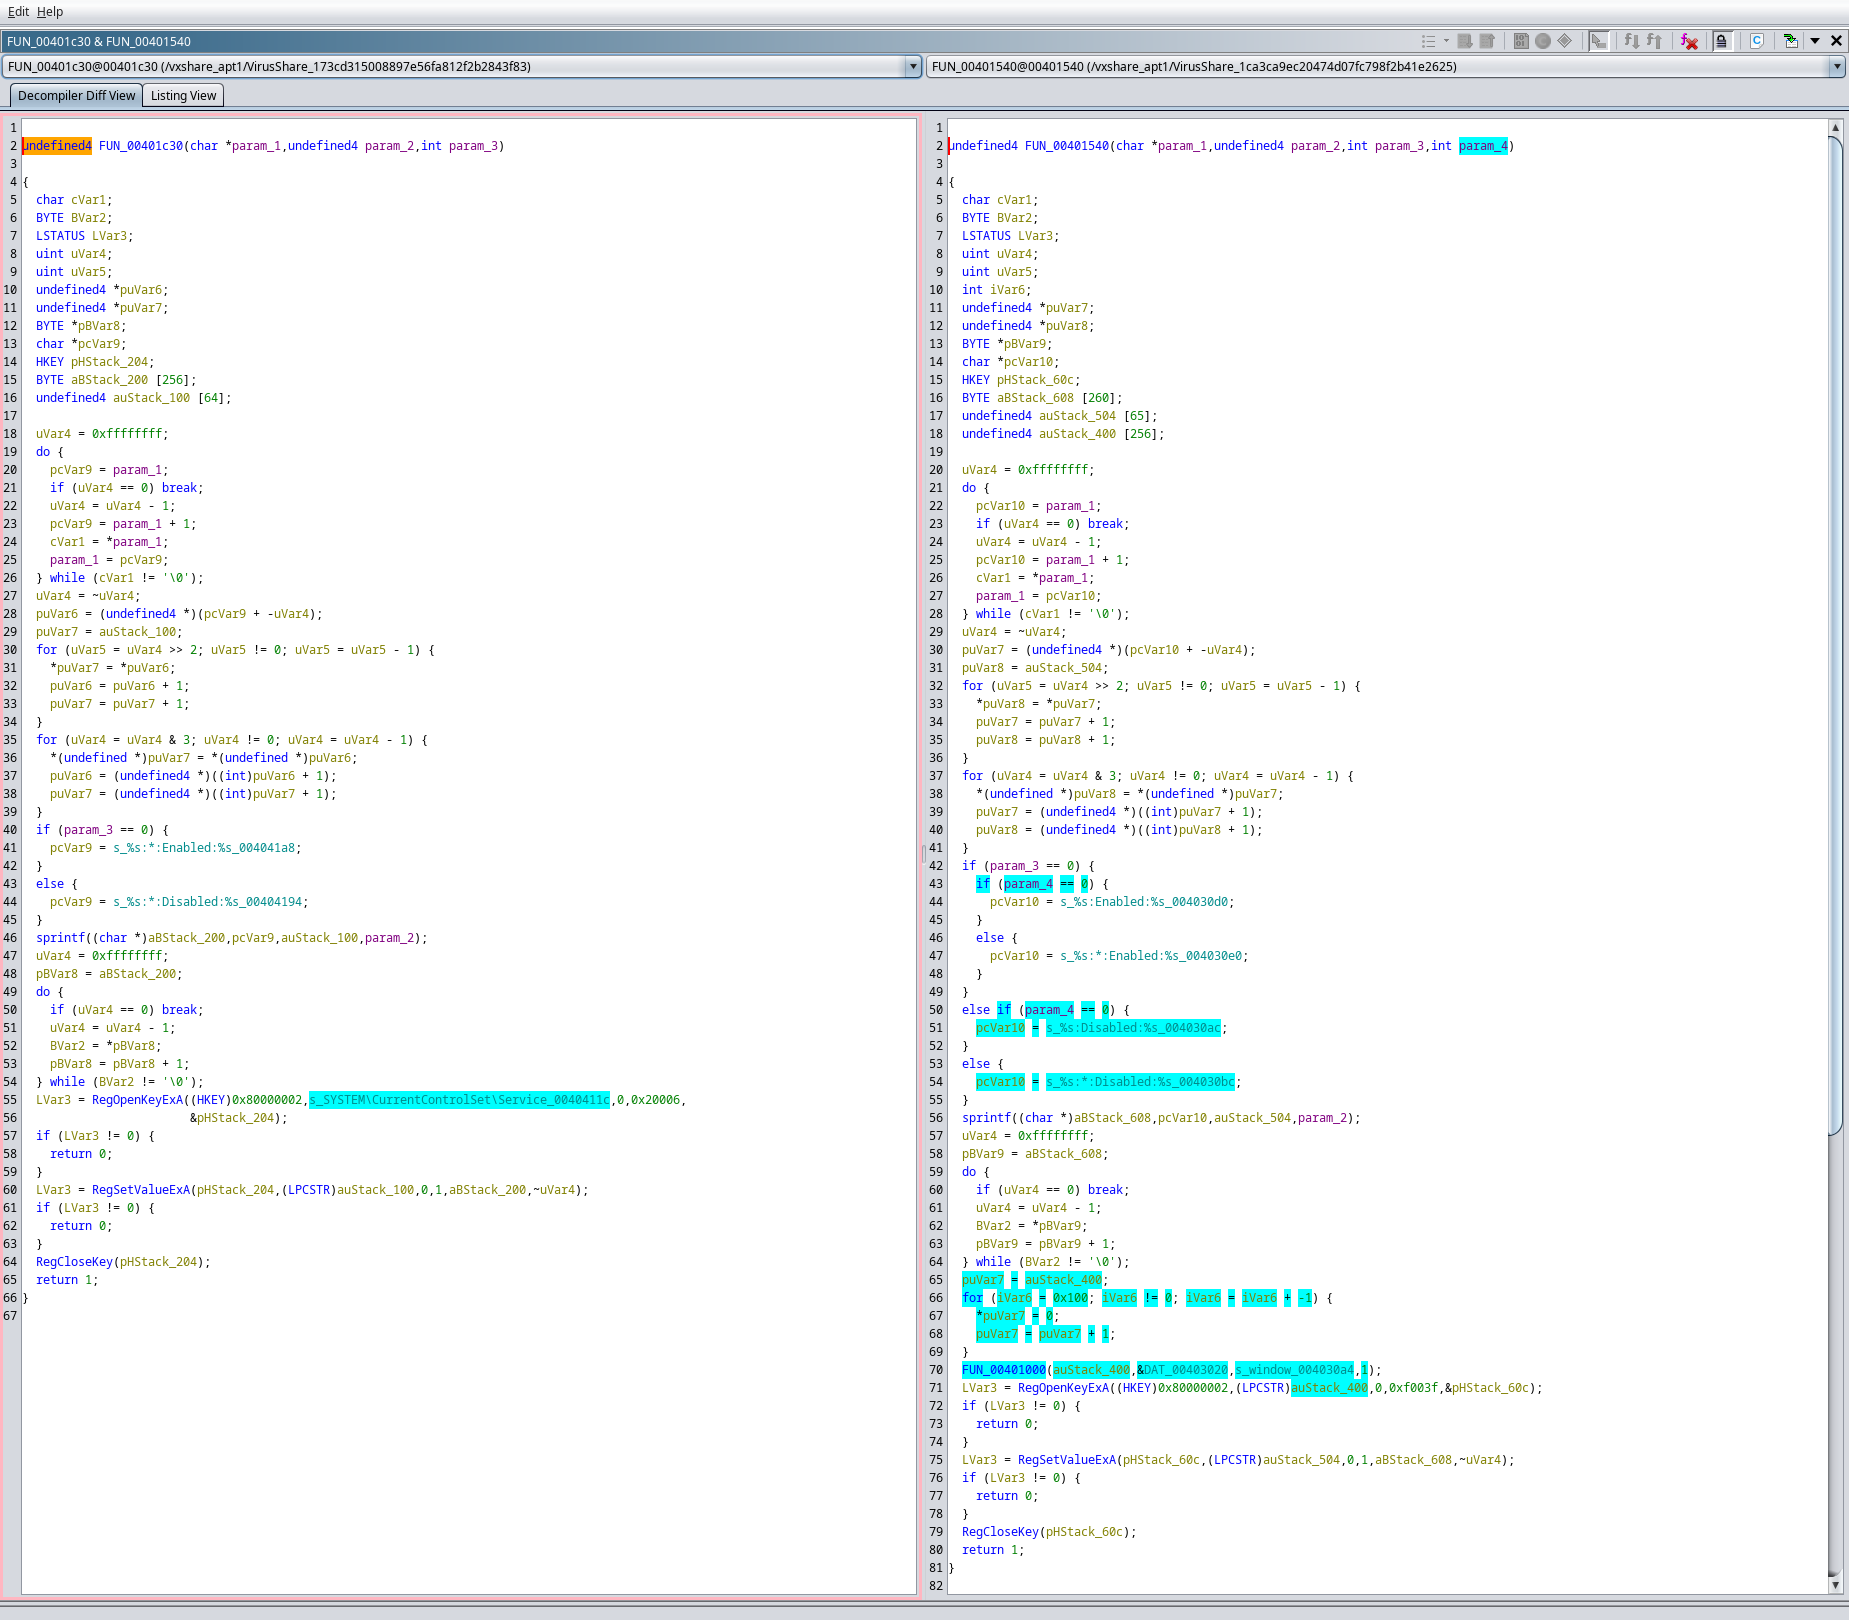
Side-by-side Function Comparison
Selecting one of the rows that isn’t a 100% similarity match, and right-clicking, provides access to the Compare Functions view (shortcut is SHIFT+C). In this view, both functions are shown side-by-side, with highlights where differences are identified. The default view is the decompiler pseudo-C output, but the view can be switched to disassembly by selecting the Listing View tab at the top of the window. This view is useful for helping speed to confirmation of such differences. In the example below, with the highlighted code in blue, it could be deduced that the code on the right might be a modified derivative of the code on the left.
Permanent Link: https://blog.malware.re/2023/12/26/ghidra-bsim/index.html