Wiimote on Linux with /dev/input
Recently, I finally got into Raspberry Pi hobby-ism, with some free time I had. I had long ago purchased a copy of Matt Timmons-Brown’s “Learn Robotics With Raspberry Pi“, intending to go through it at some point with a Pi 4 kit that a good friend gifted me one year. Halfway through the book, I’ve had to adjust many of the tutorials to the fact that the newer version of Raspberry Pi OS has made some breaking changes since it was called Raspbian. A major development was that Linux has since released a native driver for the Bluetooth Nintendo controllers that works with the Linux Input subsystem as an HID. Unfortunately, the chapter in the book was writted for an older python3-wiimote library that attempts to communicate via raw BT protocol, and has very limited controller support: it was not compatible with my newer Wiimotes for the Wii-U. As a result, I had to learn this standard interface, via the Python evdev package, and adapt the exercises in Chapter 4 to Linux HID and evdev.
The book
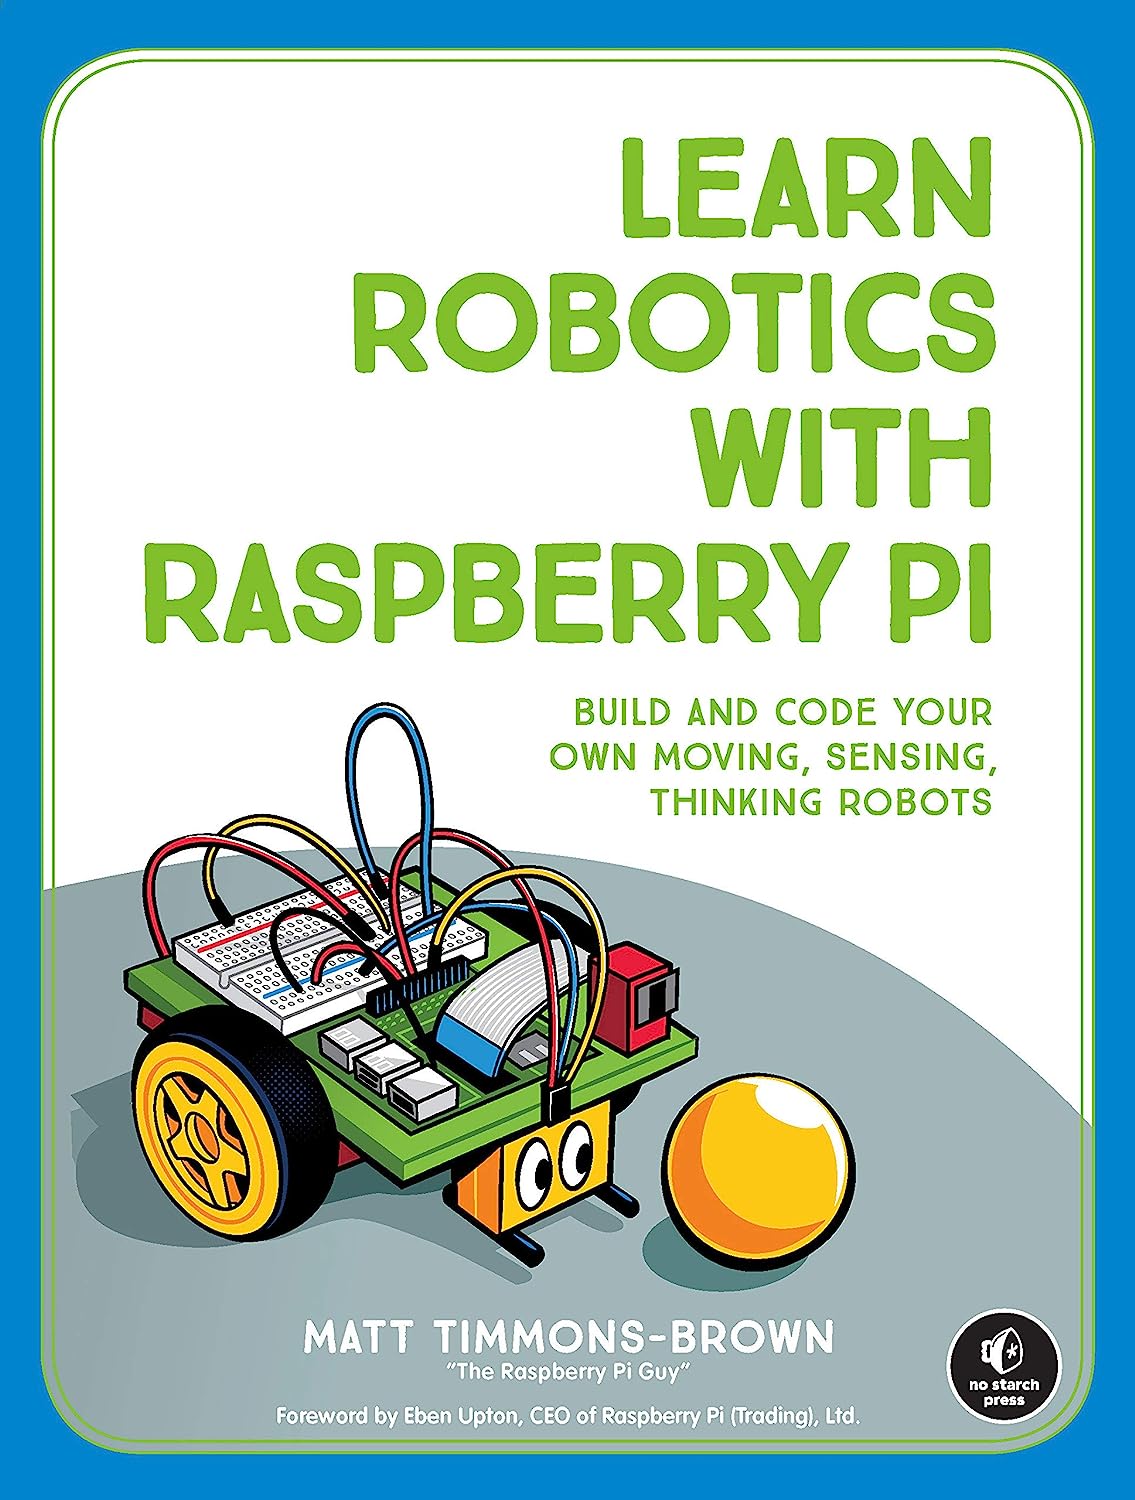
To start with, I’d love to give credit to Matt Timmons-Brown, a. k. a. The Raspberry Pi Guy, for authoring the “Learn Robotics With Raspberry Pi“ Book, shown below.
The book is a really great crash-course into tinkering with the Raspberry Pi, as well as hardware hacking. However, being published in 2019 means that some of the exercises need to be adjusted if you intend to work with the newest Raspberry Pi software environments. Most significantly, the following developments may need to be worked around:
- Raspbian OS has since been superceded by Raspberry Pi OS, which is a new derivative of Debian that departs from Raspbian in a number of ways
- The current Linux kernel installed by the OS is 6.1, which has much improved hardware support, compared to the 4.1x/4.20 versions contemporary to 2019
- Python 2 has been end-of-lifed, replaced with Python 3 and largely removed from Linux distributions without some manual effort
In my case, as a security-minded engineer, I prefer to take on the challenge of adapting older projects to modern-day stable releases of software, versus trying to install a base software platform that is composed of older software components that are unlikely to be updated to fix remaining bugs or security vulnerabilities.
Kernel Driver and Tools
First of all, the platform this is written for is as follows (this can be looked up on any system by running lsb_release -d):
Description: Raspbian GNU/Linux 11 (bullseye)
In this version of Raspberry Pi OS (as of Kernel 6.1.28), the driver for the Wiimote family hardware support is named hid-wiimote and can be loaded
using the following command:
sudo modprobe hid-wiimote
To ensure this always gets loaded at boot time, add it to the modules-load.d configuration:
echo hid-wiimote | sudo tee /etc/modules-load.d/wiimote.conf
You will also want to make sure the following packages are installed, as well:
apt-get install bluez python3-evdev xwiimote libxwiimote2 libxwiimote-dev
Finally, you will want to make sure that the bluetooth service starts on boot, if it isn’t already set to do so:
sudo systemctl enable --now bluetooth.service
Enabling Bluetooth
On your device, bluetooth may be blocked by default. A lot of Linux distributions, such as Raspberry Pi OS have
started using ConnMan for managing networking, bluetooth, and modem connections. If your
distribution uses this, then you will find that the common advice to use rfkill unblock bluetooth does not preserve the changes
after reboot, and that’s because connman has taken over this responsibility as well. If using connman, such as on newer Raspberry
Pi OS, then you can run the following to see the state of the Bluetooth controller:
connmanctl technologies
Which will output similar to this (note the bluetooth section):
/net/connman/technology/p2p
  Name = P2P
  Type = p2p
  Powered = False
  Connected = False
  Tethering = False
/net/connman/technology/ethernet
  Name = Wired
  Type = ethernet
  Powered = True
  Connected = False
  Tethering = False
/net/connman/technology/wifi
  Name = WiFi
  Type = wifi
  Powered = True
  Connected = True
  Tethering = False
/net/connman/technology/bluetooth
  Name = Bluetooth
  Type = bluetooth
  Powered = False
  Connected = False
  Tethering = False
If Powered = False is listed under the */bluetooth section, then run the following to enable it:
connmanctl enable bluetooth
Behind the scenes, connman is controlling rfkill for you, to do the work.
Ensure Bluetooth At Boot
I wrote the following systemd unit file to handle performing the above task at boot, and ensure the system comes up
in a “bluetooth enabled” state, on startup. Save the following into /etc/systemd/system/bluetooth-unblock.service:
[Unit]
Description=Unblock bluetooth with rfkill
After=connman.service

[Service]
Type=oneshot
ExecStart=/usr/bin/connmanctl enable bluetooth
ExecStop=
RemainAfterExit=yes

[Install]
WantedBy=multi-user.target
Then run the following to make sure systemd loads the updated config:
systemctl daemon-reload
Finally, run the following to make sure it runs every boot, and also run it right now:
systemctl enable --now bluetooth-unblock.service
Without ConnMan
Many other Linux distributions use NetworkManager instead of ConnMan. The older releases of RaspbianOS, as well as Ubuntu and a number of others.
If you don’t have connman, then the recommended advice is to use rfkill which, if the systemd-rfkill unit
is installed, should save your chosen bluetooth state to a persistent location on disk that will tell it how to restore on
reboot:
rfkill unblock bluetooth
Trusting and Connecting the Wiimote
As Bluetooth requires an authorization to associate two wireless peers, merely loading the kernel driver and turning the Wiimote on isn’t sufficient to use it with the Pi.
You will first need to associate the Wiimote with the Pi, by trusting it, and then establishing a connection.
The bluetoothctl CLI tool can help with this. Run it with no
arguments from the command line, and you’ll be presented with an interactive shell. Any of the commands you type on this shell can also be
provided as command-line arguments to bluetoothctl, so scripting is streamlined using that method.
Once loaded, you should see something like the following:
Agent registered
[CHG] Controller 12:34:56:78:90:AB Pairable: yes
[bluetooth]#
To discover the Wiimote, you will need to issue the scan on command. Immediately after doing so, press the 1 and 2 buttons simultaneously
on the Wiimote, you should see nearby discovered bluetooth devices reported to you, and one of these should be the Wiimote. If you don’t see it on
the first try, keep trying until it is reported by bluetoothctl:
[NEW] Device AB:CD:EF:01:23:45 Nintendo RVL-CNT-01-TR
[CHG] Device AB:CD:EF:01:23:45 LegacyPairing: no
[CHG] Device AB:CD:EF:01:23:45 Name: Nintendo RVL-CNT-01-TR
[CHG] Device AB:CD:EF:01:23:45 Alias: Nintendo RVL-CNT-01-TR
[CHG] Device AB:CD:EF:01:23:45 LegacyPairing: yes
[CHG] Device AB:CD:EF:01:23:45 RSSI: -80
The Name and Alias parameters may differ slightly, depending upon the hardware. Once you see this, record the device id (AB:CD:EF:01:23:45
in this example).
Next, you will want to trust the device. To do this, hit the 1 and 2 buttons again on the Wiimote, and run the following command. It may be easier to type the following command first, and then activate the Wiimote, and then hit ENTER to run it:
trust AB:CD:EF:01:23:45
Finally, once trusted, you need to establish a connection to the Wiimote. To do this, power on the Wiimote, but this time just use the power button, or any one of the other buttons, and don’t press 1 & 2 together. Similar to above, you may want to type this out first and then hit ENTER after you power on the Wiimote:
connect AB:CD:EF:01:23:45
If the Wiimote connected successfully, you should see the first indicator LED light up.
Note that if the connect fails, you may need to go back to the top and start by trying to establish the trust again with the Wiimote.
Installing Support Tools
A useful command line tool named xwiishow exists that can provide an ncurses real-time reporting interface of the Wii controller inputs, using
the standard Linux HID input system.
apt-get install xwiimote
For Python, there’s also an evdev library that exists that provides a programmatic interface to the HID devices as well:
apt-get install python3-evdev
xwiishow
The xwiishow utility is part of the xwiimote, and can be used to show you what the Wiimote’s input
status is in real-time. To verify it detects your Wiimote, run the following:
xwiishow list
You should see output similar to this (note the numeric id’s may vary):
Listing connected Wii Remote devices:
  Found device #1: /sys/devices/platform/soc/fe201000.serial/serial0/serial0-0/bluetooth/hci0/hci0:12/0005:057E:0330.0008
End of device list
xwiishow will accept either the device path, or the device number it provides in the list (1, above), to reference the Wiimote.
To watch the Wiimote input reporting for the above example, simply run:
xwiishow 1
You should then see a full-terminal ASCII-art display of all the supported inputs, and the ones the Wiimote provides data for will be updating regularly.
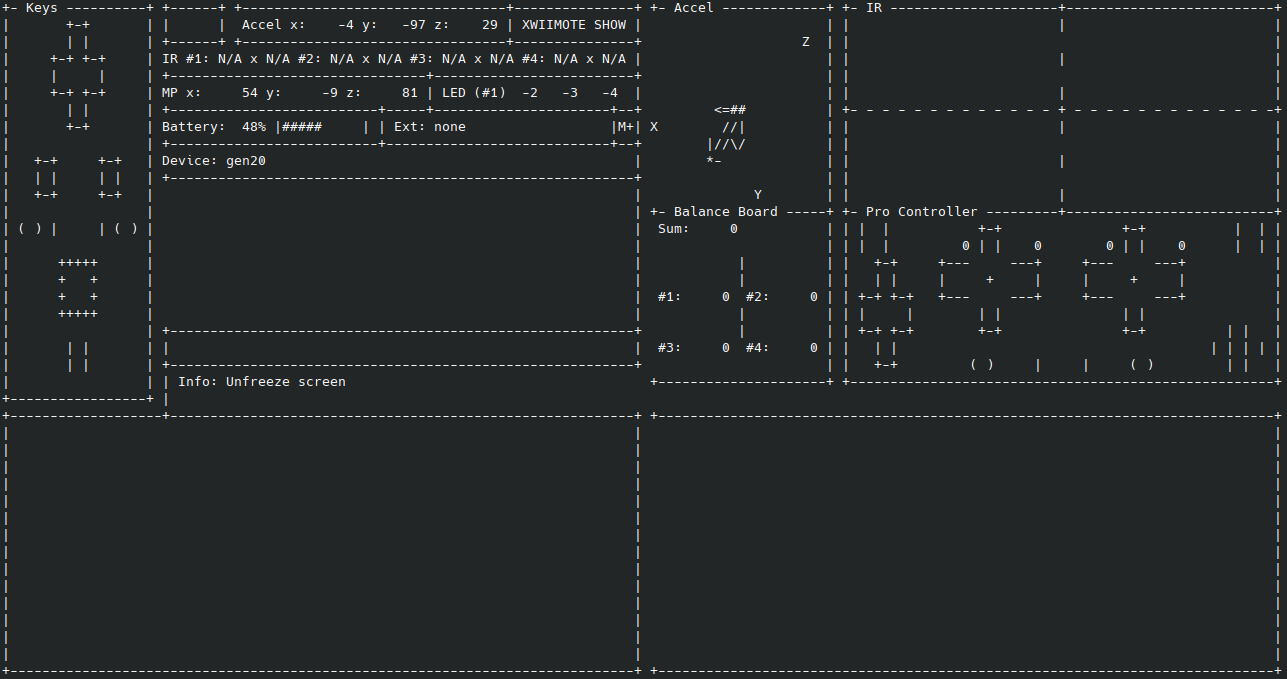
If it is working correctly, you should see the numeric values next to the Accel: label fluctuating frequently, as well as the shape
of the ASCII-arrows displayed in the Accel box near top-middle of the screen. The Keys box at upper-left should display the status
of the buttons on the Wiimote if you press any of them. The xwiishow utility is helpful in validating that your Wiimote is connected
and communicating properly, before you start writing new code to interface with it.
Interfacing it with Python3
In the Robotics book mentioned at the beginning of this blog article, it describes using the legacy program to interpret the inputs
as axis values between 0.0-1.0, in order to use them as multipliers for the motor inputs. Additionally, thresholds along the
Wiimote’s Y-axis are used to determine the drive instructions from one of the following:
- Forward (use X-axis magnitude for power of both wheels)
- Backward (use X-axis magnitude for reverse power of both wheels)
- Left (use Y-axis magnitude for forward power of right wheel, reverse power of left)
- Right (use Y-axis magnitude for reverse power of right wheel, forward power of left)
- Stop (halt both motors)
The below Python program can be used to perform the same conversion, with the logic broken out a bit more into separate steps.
#!/usr/bin/env python
import time
import evdev
import os
import sys

INPUT_DIR='/dev/input'
WIIMOTE_NAME='Nintendo Wii Remote Accelerometer'
WIIMOTE_MAX=103
WIIMOTE_MIN=-105

def get_wiimote_accel():
    for evnode in os.scandir(INPUT_DIR):
        if evnode.is_dir():
            continue

        try:
            device = evdev.InputDevice(os.path.join(INPUT_DIR, evnode.name))
            if device.name == WIIMOTE_NAME:
                return device
        except:
            continue

    return None

wiimote = get_wiimote_accel()

if wiimote:
    print("Found Wiimote: {}".format(wiimote))
    x = 0
    y = 0
    z = 0
    drive_direction = "s"
    steer_direction = "s"
    sys.stdout.write('X: {}, Y: {}, Z: {}            \r'.format(x, y, z))
    for event in wiimote.read_loop():
        if event.type == evdev.ecodes.EV_ABS:
            adj = 0.0
            if event.value >= 0:
                adj = float(event.value)/float(WIIMOTE_MAX)
            else:
                adj = float(event.value)/float(WIIMOTE_MIN)
            if event.code == evdev.ecodes.ABS_RX:
                x = adj
                if event.value < 0:
                    drive_direction = "b"
                elif event.value > 0:
                    drive_direction = "f"
                else:
                    drive_direction = "s"
            if event.code == evdev.ecodes.ABS_RY:
                y = adj
                if event.value < 0:
                    steer_direction = "r"
                elif event.value > 0:
                    steer_direction = "l"
                else:
                    steer_direction = "s"
            if event.code == evdev.ecodes.ABS_RZ:
                z = adj

            direction = drive_direction

            if y > 0.3:
                # If Wiimote turned more than 1/3 either way, then send a steering instruction
                # instead of a forward/backward instruction
                direction = steer_direction
            else:
                # In order to give more generous "stop" range, only send a drive instruction if
                # the Wiimote is tilted 10% forward or backward
                if x < 0.1:
                    direction = "s"

            sys.stdout.write('X: {:0.3f}, Y: {:0.3f}, Z: {:0.3f} ({})   \r'.format(x, y, z, direction))
This should display a constantly-updating output that looks similar to this:
Found Wiimote: device /dev/input/event2, name "Nintendo Wii Remote Accelerometer", phys ""
X: 0.048, Y: 0.000, Z: 0.942 (s)
The parenthetical at right is the motor instruction that would be sent. You should be able to follow the remainder of the lab and substitute something derived from the above code, to perform the motor controls.
(f): Forward(b): Backward(r): Right(l): Left(s): Stop